Pssst..... want to know the secret to a great holiday season? Spending time with family and sharing the message, of course!
This DIY I am Second wristband wreath will help you do both. The wreath holds and displays I am Second wristbands and makes it easy to give them away! And when they're all gone? The wreath still looks great and is easy to re-stock.
Gather friends and family to help create this fun wreath, or invite them over after you've made it to make sure they have their own wristband this season! Here's how:
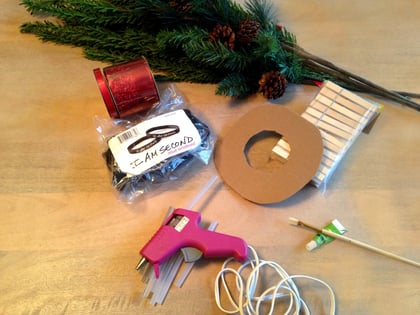
1. Some fake greenery from Hobby Lobby or any other craft store. We chose some soft leaf fabric stems (easy to cut and glue) and some other greenery that had pine cones on it.
2. Some clothespins! This will make it easy to hold and distribute wristbands to guests. We bought a 24 pack.
3. Piece of cardboard cut into a circle. The middle of ours was about the circumference of a coffee mug. Width of the actual cardboard is about 3-4 inches.
4. Glue Gun. Other strong tacky glue will work too, it just may take a little longer to dry.
5. Ribbon to hang the wreath.
6. Green paint and paint brush.
7. 25 pack of I am Second wristbands.
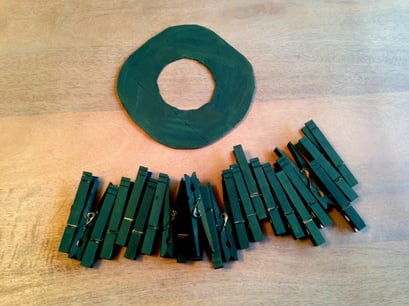
Using your green paint, paint the clothespins and one side of the cardboard circle. We painted the majority of each clothespin but left the inside of the "clip" unpainted (the part that holds clothes, or in this case, the wristbands).
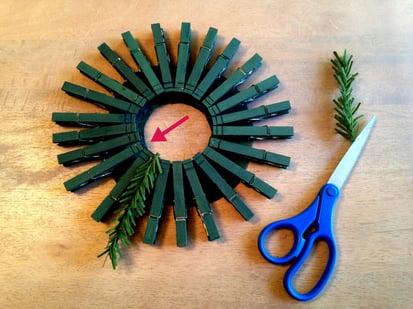
When the paint is dry, glue the clothespins on top of the cardboard circle, green side up. Make sure the inside of the circle of clothespins is the part you normally squeeze to open a clothespin, as the arrow shows in the image. (The actual clip of the clothespins should be facing outward so it will hold your wristbands on the outside of the wreath.)
Once the clothespins are glued to the wreath and secure, cut some of your greenery and glue to the top of clothespins. You can make the length of each stem vary, but make sure the stems line up with the inside of the circle, not extending beyond the part of the clothespin that you squeeze. (They can extend a little at the end of the clothespins where you'll clip the wristbands in).
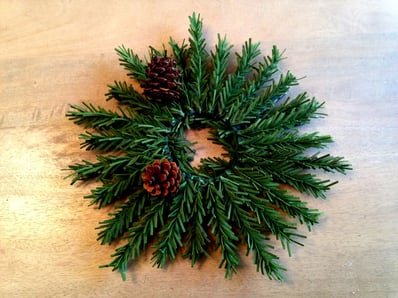
We took the pine cones off the other greenery we purchased and glued them straight on to the fabric leaves. If you decided to use fake pine as your leaves, you may have to tie the pine cones down with thin wire, as the glue may not hold well. You can also skip the pine cones and decorate with whatever you like (ribbon, small ornaments, etc.) or just leave it green! Lastly, we glued a little extra greenery on the inside of the circle where any cardboard was showing, just to make it look more full. This is optional!
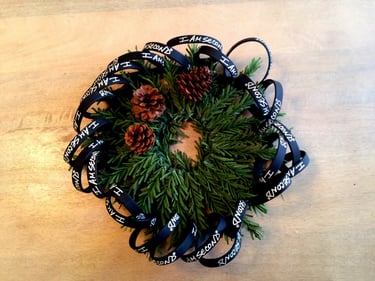
Squeeze each clothespin from the inside of the circle and place a wristband on the outside of the wreath where the clothespins clamp down. We made our wristbands face upward so visitors could see the message and it also looks a little more full. This is also the point where you add ribbon to hang the wreath. There are multiple ways to do this. We folded a long piece of red ribbon in half, put the loop through the middle of the wreath, and brought the loop back up to put the ends of the ribbon back through the loop. Hide the ribbon that's wrapped around the wreath between a couple clothespins, then lastly, tie a bow!
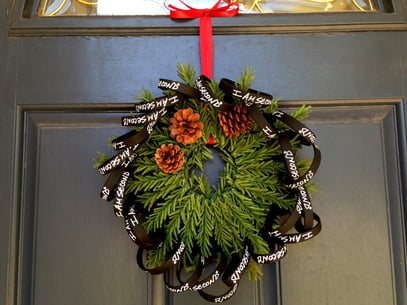
You're done! Time to display and give away some wristbands. You can hang this outside on your front door, or inside! After the Christmas season, you can keep customizing the wreath to make it last all season: change the ribbon to a festive "New Year" color like gold; re-stock the wristbands or just leave it green; have it hold any Christmas cards you received; remove the Christmas-y ornaments and attach flowers on it by the time Spring comes, etc. So many options!